Wednesday, February 11, 2009


This shows the connection and the triangulated bracing. The tabs at the connection are the main problem, because they are slanted in three axes. this means each brace is connecting to two tabs which are at slightly different angles - twisted off axis from each other.
This shows the panel I created with the offset surface. In most cases, the intersections of the paneled lines occurs in the center of the ribs, which is our goal. But, when I looked closer, I realized that many of those intersections are still occurring on the edge of the rib or off center. To use the connection we have designed, this won't work.
This image shows what steps I took after making the more accurate ribs. I took a line extracted from the middle of the outside edge of the rib, offset it into the rib 3", and then made a surface out of that collection of offset lines. Then I made a new offset surface that I could then panel to get the precise positions of the cross braces.
This was the method I used for extracting more accurate lines for the ribs. I used angled planes through the paneled points on the surface and then trimmed the planes to the surface. Then I duplicated the edges, offset the edges individually to create the depth of the rib, created a surface with those two lines, then offset the surface as a solid to create the completed rib. In the end, the ribs are centered laterally on the lines created in the above image.

Tuesday, February 10, 2009

We needed to find an accurate path for the triangulated grid on the 3D ribs. To try and do this, I extracted a line on the center of each rib and created a new surface to panel from these lines. Due to small imperfections on the ribs, the surface did not line up with the ribs in an accurate enough way. I now need to go back and recreate the ribs with a more accurate method. Yipee.

Monday, February 9, 2009

Reconstructing

We decided to convert our major ribs to be rectangular in section. As a first try, I offset the rib line to make one side of the rib, then offset that surface as a solid to get the thickness of the rib.

Monday, February 2, 2009

Panel attempt

This is another attempt at the paneling tool. I attempted to use multiple grid layers when making the panel, but the result is less than I expected. I wanted to experiment with a really simple cruciform to see if I could make it work, but I obviously am missing something in the process.

Wednesday, January 28, 2009

This is the lofted surfaces and then the result of an initial paneling exercise. It made me realize that the modeling of the panels has to be completely done in the paneling tool, which I don't really know how to model in. Am I confused or what?
This is what happened when I offset the shape - any ideas why this happened? I can't make it go away! It also happens if I offset to the inside.
I followed Calvin's advice and worked with the three profile curves. It didn't work as lines that had been separate and then joined, but when I traced full curves over the separated ones, the loft worked.

This shows the original loft in white and the offset one in green.

Tuesday, January 27, 2009

panel 2

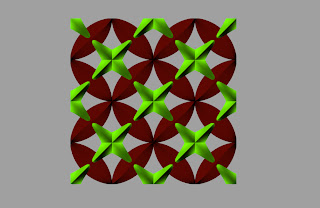
Here's the aggregate copied a bunch to show the pattern that emerges. Still working on how to make the connections....... and to maybe express the lattice more 3 dimensionally.

panel 1


This is my first attempt at the panel - an aggregate that is symmetrical on one axis. It's way basic for two reasons - I had to make it simple to wrap my brain around what would create a lattice, and my rhino skills are still doing baby steps.

Wednesday, January 21, 2009

Wednesday, January 14, 2009

Monday, January 12, 2009

link to rhino tutorial files online

http://geometrie.uibk.ac.at/Archiv/CAD/Rhino_Handbuch/Training%20Level%201/